Removing a supervisor password from a ThinkPad T420
Almost a year, whoa, time moves too fast, good thing I said: “Hopefully I will be posting regularly”.
So, yesterday I spend almost three hours (dis)assembling and trying to remove
the supervisor password from my dad’s T420. For some reason, the battery died a
few months back, so I ordered a new one, but the thing is, I do not remember
setting up a supervisor password for this laptop, neither does my dad. The
question is: did the dead battery had anything to do with this, or was I too
distracted stupid to realize about the supervisor password when I bought the
machine?.
In either case, here is my experience trying to remove the password (spoiler: it was frustrating, but I did it). This is not a technical description of the process, I barely know about electronics, so proceed with caution.
Getting the necessary tools
To be honest, this was the simplest part. You will need:
- screwdrivers
- tweezers
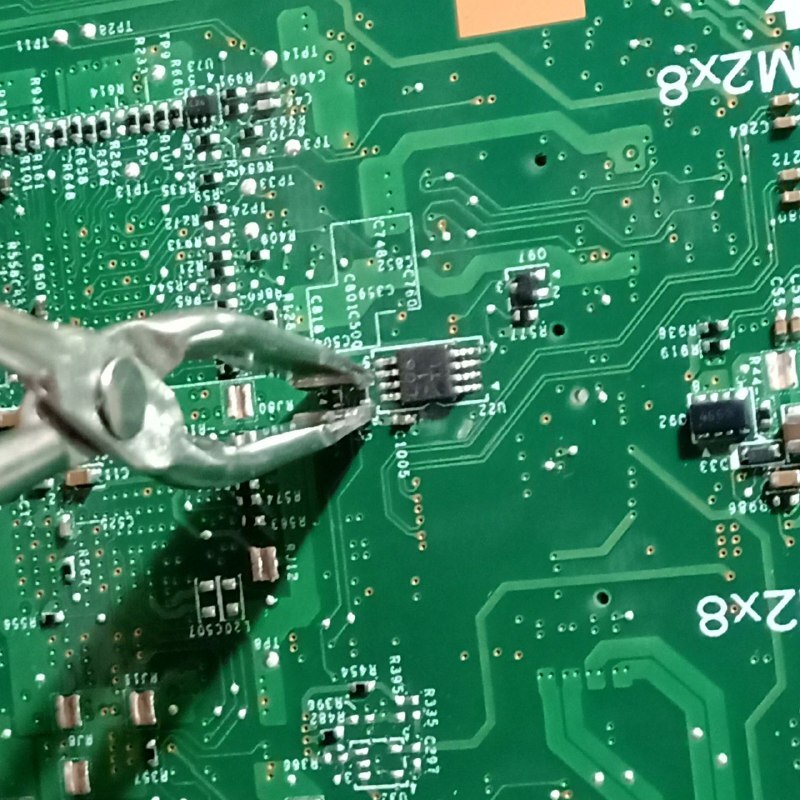
In one of the pictures below I show the tweezers I used.
Disassembling the T420
I have disassembled this ThinkPad a couple of times, so, this was pretty straight forward, you just need to follow the Hardware Maintenance Manual (HMM) up until (and including) the section 1200 - Magnesium structure frame. I will recommend you to separate the screws according to the sections in the HMM so you remember where is supposed to go each screw (or at least have an idea) so you do not end up with spare screws or lacking some of them.
Identifying the pins
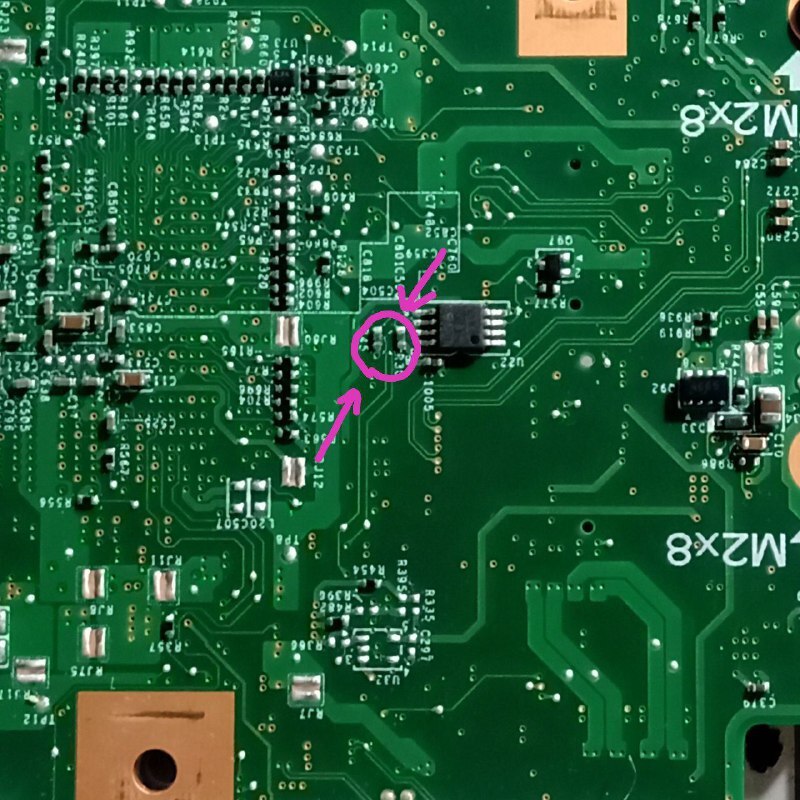
In the bottom part of the motherboard (MB), next to the DVD bay connection, we will find a little chip, and next to it our targets, the pins R30 and R45. Here are a couple of pictures to help you spotting those things:
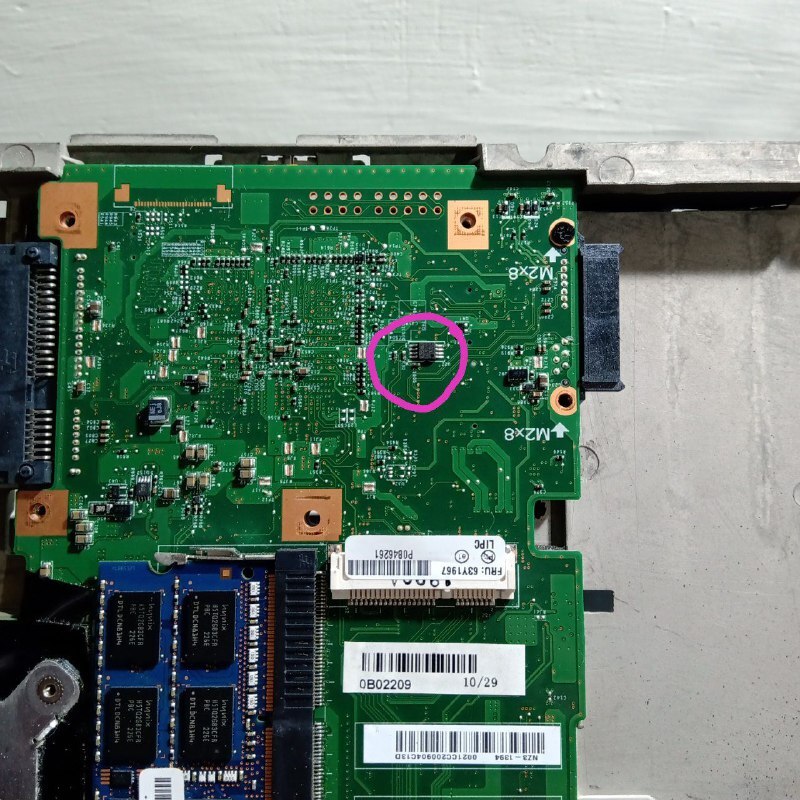
A closer look:
Plugging the necessary stuff
Unfortunately, we need a couple of parts plugged to the motherboard in order to proceed:
- fan (if we do not connect this the computer will display a
No fanerror message) - display (unless you have memorized every aspect of the BIOS interface)
- keyboard (yeah, we need to navigate the BIOS interface)
- barrel plug connector (the machine needs… electricity?)
These other are optional, since I was on my own they came handy:
- magnesium structure frame
- 2 x 6mm screws (for holding the display)
- 1 x 3mm screw (for holding the MB to the magnesium structure)
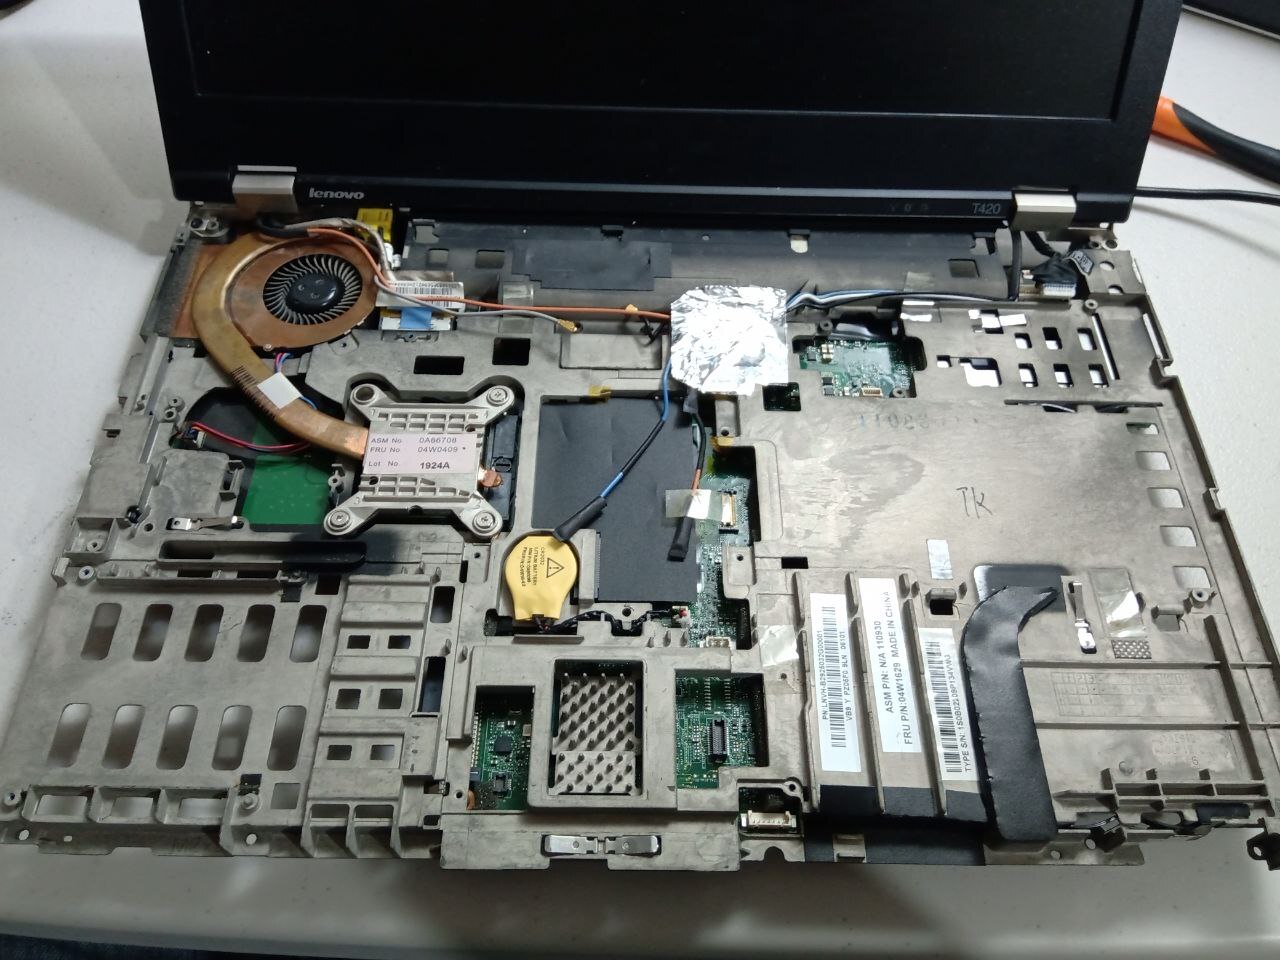
I attached the MB to the magnesium structure and used the 3mm screw for holding it, so when I was using the tweezers it did not move. Next, I inserted the display and added the two 6mm screws to hold it in place. It ended up looking like this:
Positioning the computer?
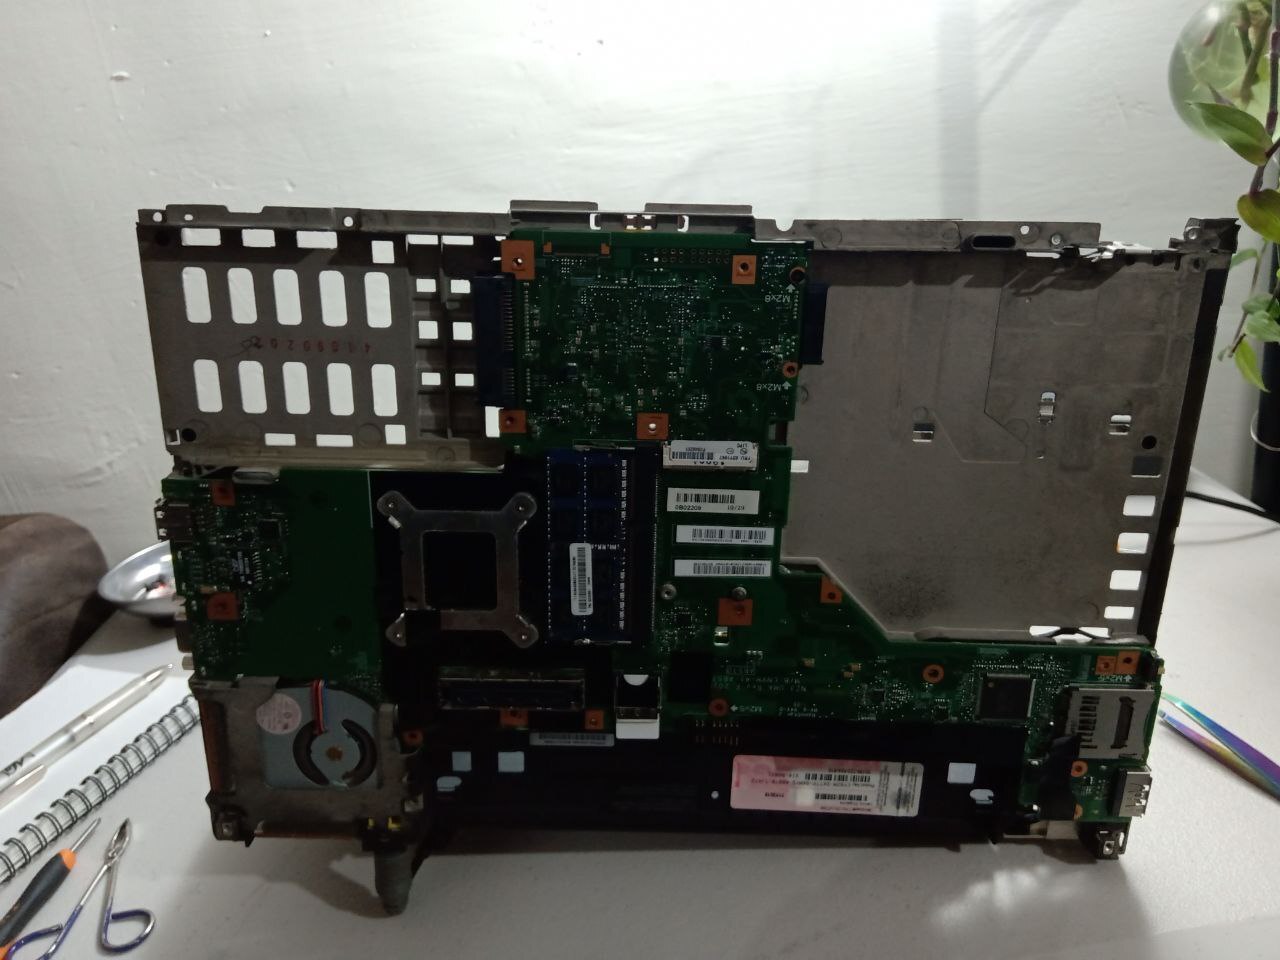
You computer has to be in a position where you can hold both pins with one hand, touch the keyboard (with the other hand), see the display and be able to have the computer powered with the charger. Someone’s help will be handy here. My positioning looked something like this:
Getting used to bridging the pins?
Before we proceed I will recommend you to get used to holding down the pins, since we will need to keep holding them for a few moments meanwhile we reset the password with the keyboard (this was the hardest part for me).
With the MB unplugged to the power connection (remember, we are getting used to it) hold on the pins firmly, if you do it with too much force the tweezers will slide off.
Removing the supervisor password
This is the trickiest part, I found two youtube videos, and both of them had part of the answer, so, here are the steps I used to remove the password:
- Plug the power supply to the MB
- As soon as the ThinkPad logo appears, hold the pins, TRY not stop holding them1.
- Wait until the logo disappears and press F1 for entering to the BIOS.
- If the supervisor password field appeared you were not holding the pins correctly. Shutdown the computer and try again.
- Once you’re in the BIOS go to
Settings -> Security -> Supervisor Passwordand hit Enter. - You would be prompted for entering a password, press Enter in the first field.
- Up until this point you CAN STOP bridging the pins.
- Hit Enter in the second password field.
- Press F10 so the settings are saved.
Now try to get into the BIOS, if you still are prompted for a password try again (I tried almost 20 times before I was able to remove it :c ), you do not need to unplug the power, powering off the laptop is enough.
If you can access all the settings, congratulations!, you defeated the supervisor, now go, enjoy your BIOS and install Arch Linux. :)
Final thoughts
This was not my first time attempting to remove a supervisor password, a couple of years ago, me and a friend tried on a ThinkPad Z61t, but with no success at all (we tried bridging the EEPROM). I must say, even when the process is shorter compared to flashing coreboot it is more exasperating (at least for me).
Each one has pros and cons, you get the default experience with the default BIOS, but you loose the freedom and speed of coreboot, of course, removing a supervisor only requires a couple of simple tools, while flashing coreboot demands more experience, and additional hardware. ¯\_(ツ)_/¯
I will have stayed with coreboot, but this was my dad’s computer. Still, was good to learn this process. Anyway, contact me if you have any questions or recommendations. (;
Extra Resources
- The two videos I was talking about, here and here.
- This page was useful, allowed me to find the two pins, but I could not find the rest of the guide.
Rambling
This time I am going to post at least once a month, A have challenged me to post with more frequency (he had the idea of posting once a week, that’s insane, at least for me, I really struggle writing, sometimes I feel I cannot express my thoughts correctly), so, yeah I will try to keep up with the schedule.
Also, I almost forgot… I’m about to start classes, I’m kinda nervous… It is weird starting over again, but I guess is a good thing.
Be safe, whenever and wherever you are.
-
A disclaimer note, I was able to remove the password even when the tweezers slipped right after I entered the BIOS, I moved to the
Supervisor Passwordsettings and bridged again the two pins, entered the first password, stopped holding the pins and entering the second password. I wold say, the most important thing is right timing in step 2 and holding the pins in number 5. I am not sure tho. ↩︎